New record
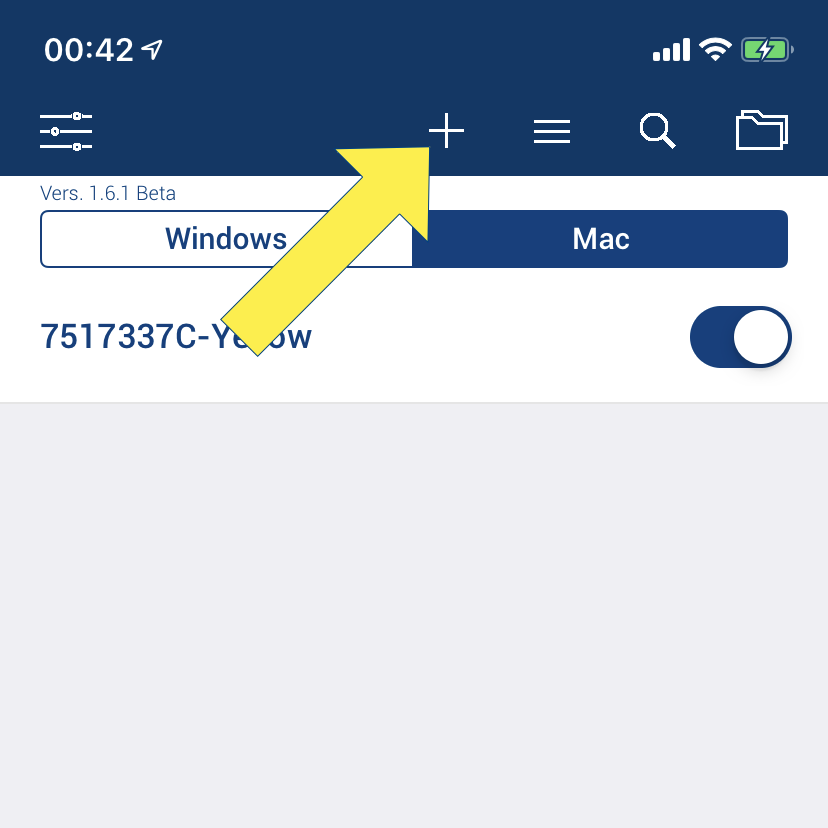 The aim of this step is to create a new login data for an account and enter it on your computer using the USB-Key.
Tap now on the plus sign to create a new login data record.
Edit
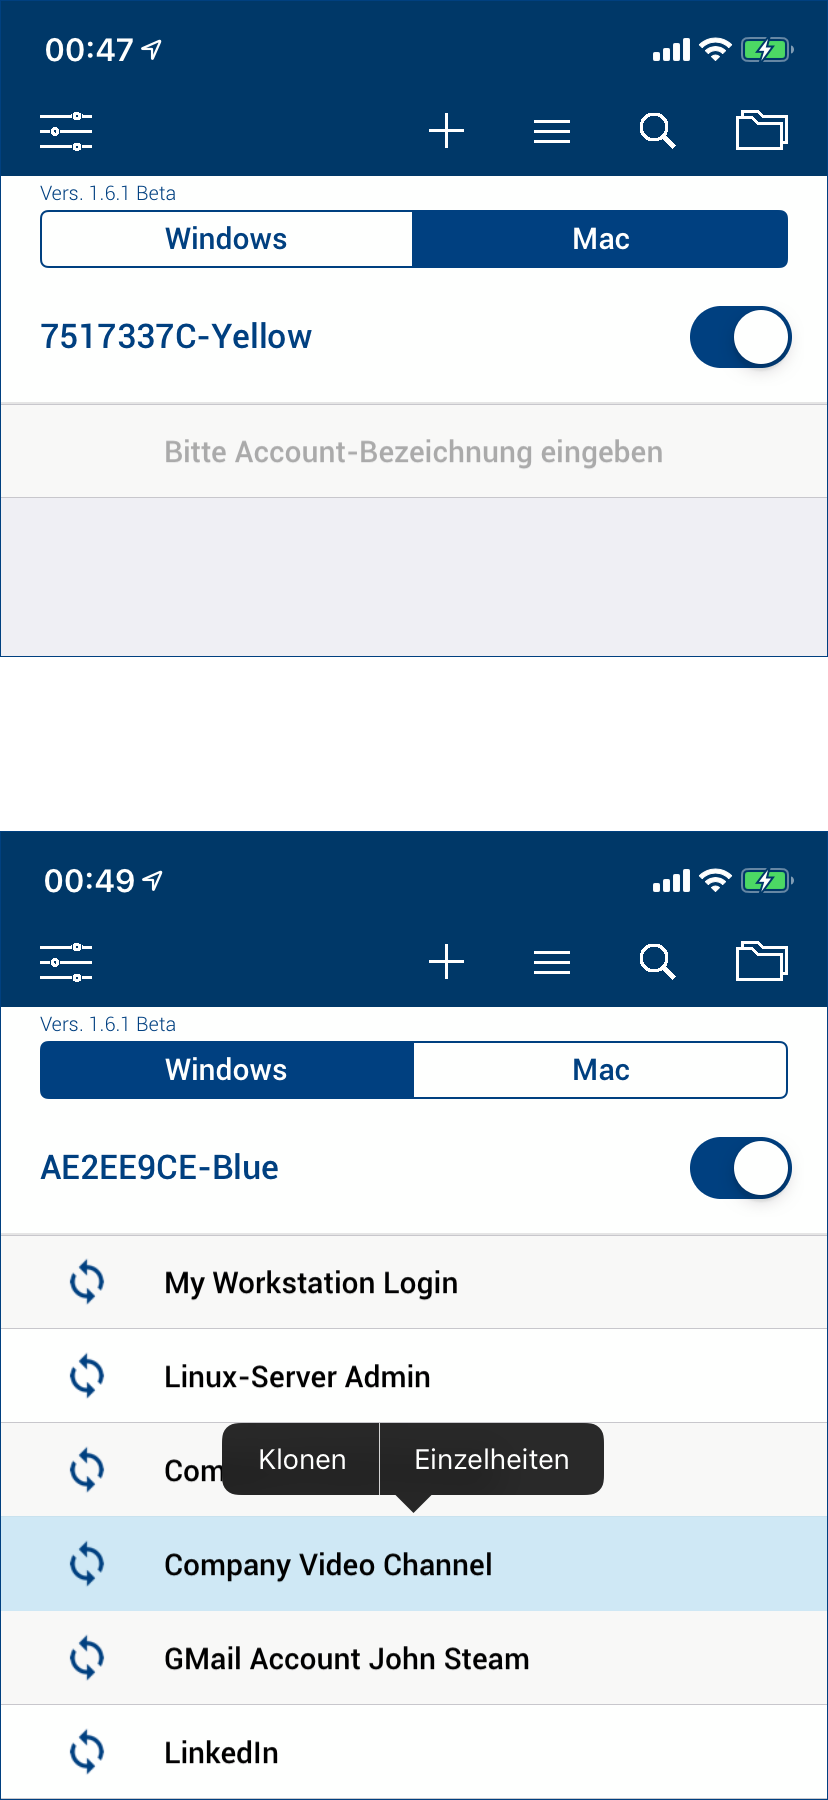 Tap on the newly created record to edit your login data.
For newly created and empty entries, it is sufficient to press shortly afterwards to access editing.
To edit an existing login record or to view its details, tap and hold the corresponding record to open a context menu.
With the context menu you can also clone the login record to create a new similar record.
Fill out items
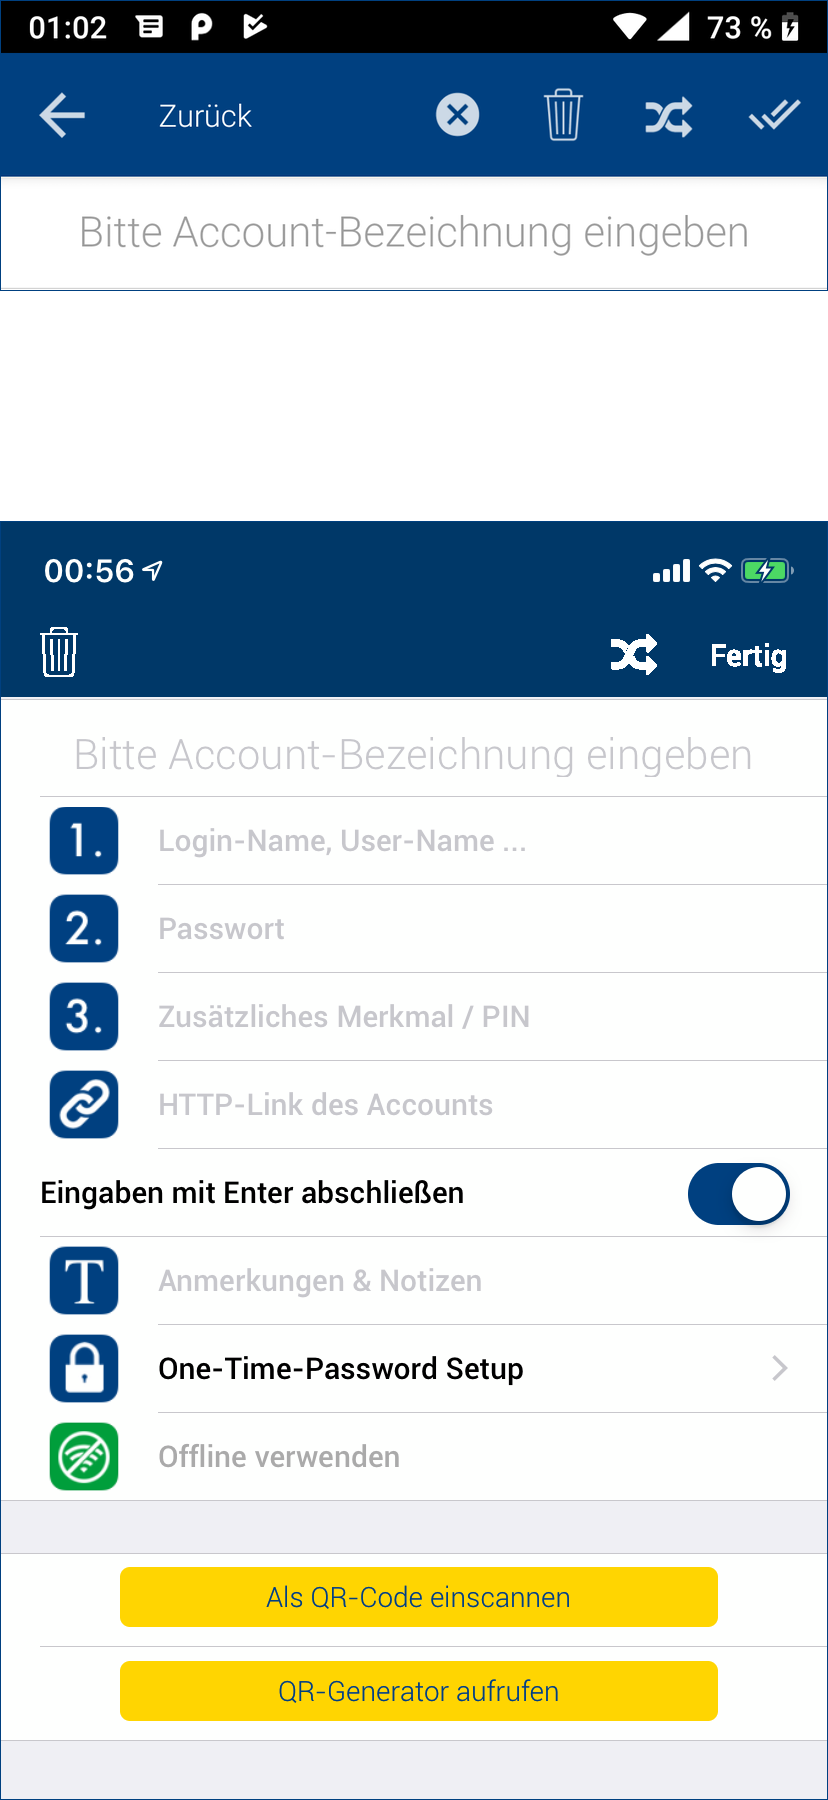 Please note: In the upper part you see the menu bar of the edit mask on Android, which is slightly different from iOS devices. In iOS, finish editing by pressing „Done“. For Android, please tap on the double tick in the upper right corner. You can delete the login record with the recycle bin. With Android devices, you can also cancel processing in any situation by checking the box to the left of the wastebasket.
Please enter the following data:
• a description, a name,
• a login or user name and
• a password.
Then save your entries. You can additionally enter a link and a short note.
Please note: When editing the login data you will see a button above the software keyboard on iOS devices and a context menu on the right-hand side of Android devices which can be used to generate a random password. Give it a try!
With the two yellow buttons you can scan the login data easily and comfortably with self generated QR codes. This works fast and is very practical if you have to enter several login data at the beginning. You will find the necessary information on how this works under „How To – Scan login data“.
Done!
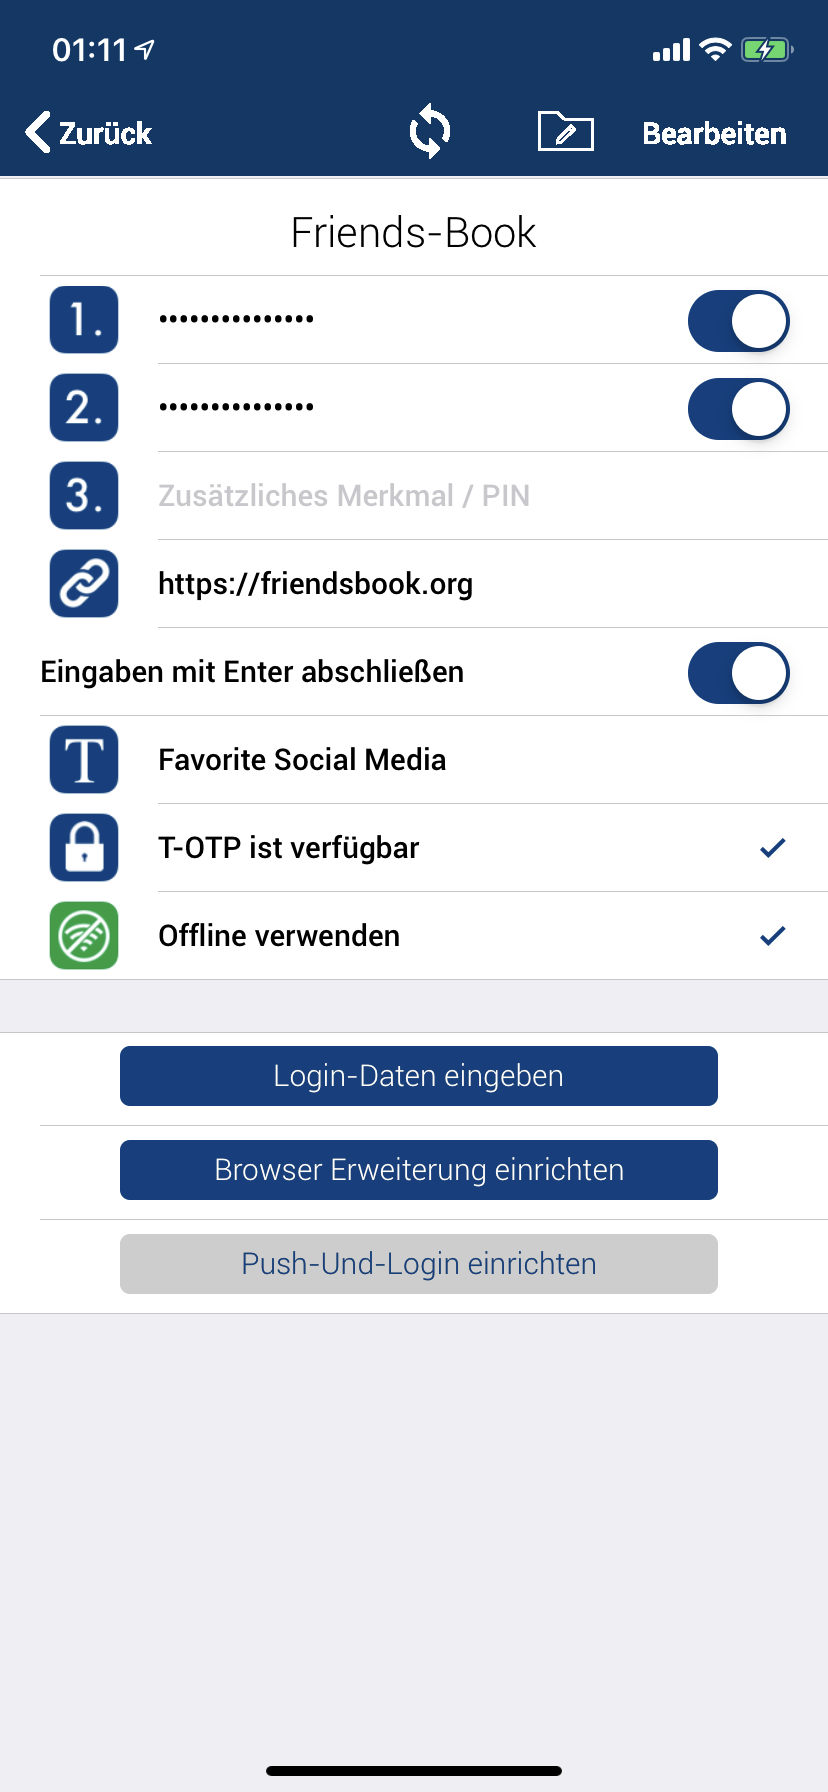 Once you have saved your entries, a screen similar to this one appears. With the blue buttons on the right side you can exclude the individual fields from the automatic input, because e.g. the login name is already in the mask and only the password is missing.
In most cases, the login process is started by pressing the ENTER key. You can also specify here whether this is also carried out during automatic entry.
The buttons „Browser Extension Setup“ and „Push-To-Login Setup“ are explained in „How To – Push-To-login“.
Try entering login data automatically on your computer right here. Or go back to the start screen and briefly touch the new entry. Do some experimenting. To test all functions and possibilities, you can use a normal text editor instead of a real login mask to see what happens. This will help you better to understand and learn how to use the possibilities of Phrase-Lock to your best benefit.
